How to Install Red Hat Linux 7.2
Oracle9i Database Release 2 Enterprise/Standard Edition for Intel Linux
Java1.4.1
Compiere 2.4.3b
By: Matthew Crowder
The following instructions are meant to help you set up
and explore the functionality of Compiere.
I STRONGLY
recommend you follow the directions implicitly and avoid installing these
programs on a Computer with any valuable data.
This How To is not intended to set you up with a
Production Ready System.
Part 1: Red Hat 7.2
Getting Red Hat.
First, you need to purchase the CD’s or download them
from the Net.
I recommend just buying the Disks, it’s a whole lot
easier for new users to install from the Disks.
However, Red Hat 7.3 may only be available in your area,
so you may want to try downloading 7.2 via the net..
(Red Hat Has Older Versions available via their FTP
server).
I am not recommending 7.3 for the sole reason that I have
not tried Oracle on it yet.
Install Red Hat.
At this point, you should have disks of some sort with
Linux on them and of course a computer.
First, make sure
your computers BIOS is set up to boot from CD
(I am henceforth
going to assume your using a CD as your install medium).
I used a PC with
1GIG of Ram, a 40 gig Hard Drive, and an AMD 1.7 GHZ Processor.
You will need at
least a 30 gig Hard Drive to follow this example.
I also recommend
you make sure that your Network Card and Video Card are Linux Compatible!
- Start your PC with your Linux Disk in the CD Rom
drive.
- At
the Welcome Screen Press Enter.
- Select
your language, then Next. For Keyboard Configuration, the default settings
should be fine for most users. Select Next.
If your using a 2 Button PS2
mouse select emulate 3 buttons.
- Click
Next. Chose Custom Install and use Disk Druid to Partition the Hard drive.
!!!!!!!!PREPARE TO LOOSE ALL
DATA ON YOUR HARD DRIVE!!!!!!!!
- If
you are using a new Hard Drive, you should just see Free Space when you
get into Disk Druid.
If windows was previously
installed, you will see something like VFAT, or NTFS labels in the drive
information.
Delete all partitions until
all you see is free space.
- Select the NEW option.
Then In the Top Most field (Mount Point), select- “/boot”
Then make the partition size 50
MB.
Leave everything else alone.
Press OK.
Do exactly the same for the rest.
- Create\Select
the partition- “/”
and make it at least 3000 MB.
- Click ok and now create “/home/oracle/oradata”
(Yes you must type it in manually)and make it 12000 MB.
Then Create the Partition- “/usr”
and make it 5000 MB
- Create the partition- “/home/oracle”
(Again you must type it in manually)and make it 6000 MB.
Create the partition- “/tmp”
make it 1200 MB.
- Finally, create the Swap Partition by selecting,
NEW, then select - SWAP under the FILE SYSTEM menu.
You don’t have to enter a mount point. Also don’t enter the
size, rather select the option
“Fill to Maximum allowable size”. Click OK.
11.
Now click Next. For the Boot loader menu, the defaults
are fine. Click Next..
12.
Grub Password? It’s your call, you don’t have to use
one.
13.
Network Configuration? Here is what I used.
|
IP Address |
192.168.1.42 |
|
Netmask |
255.255.255.0
|
|
Network |
192.168.1.254
|
|
Broadcast |
192.168.1.1 |
|
HostName |
anyNAME.anyNAME * (See Below) |
*As this implies you can
chose any two names here i.e. microsoft.sucks
or acounting.worldcom or mypc.mydomain.
14.
For the DNS use your Internet Providers DNS address. An
example of a DNS address is
207.69.188.185 or 207.69.188.186.
15.
Next… Select no Firewall.
16.
Select any additional languages you wish to have on
your system.
17.
Select your time Zone.
18.
Next.. create a Root Password. I used “oracle” The root
account is the equivalent of the Administrator
account in Windows 2000 (It is the Top Level Account). Then Click
the Add button to add a user account.
Name the user “oracle”
and give it the password “oracle” .
FYI. You now have two accounts. One called “root” the other
“oracle”.
As a rule, you don’t want to log in as root much.
19.
Click Next. You
will see the Authentication Screen. The defaults are fine click next….
20.
Now select the following packages…………..
Printing, X Window System, Gnome, Sound (If you want Sound), Network Support,
Router Firewall, DNS, Network Managed WorkStation, Authoring and Publishing, Emacs,
Utilities, Legacy Application Support, Software Development, Kernel Development.
21.
It will now try to find your video card. Select the
correct memory amount for your card and
press next.
22.
The Installation should begin!
23.
When its done installing, let it create a boot disk for
you, all you need is a 1.44 MB Floppy.
24.
Click next… Hopefully Linux will detect your Monitor
type. If it doesn’t you may need
to look on the back of the monitor to determine the sync
ranges and etc.
25.
Choose a color depth (16 bit is good) Resolution
(1024X768) If you’re having Video Card
trouble or monitor trouble I suggest (800 X 600).
26.
Also, select Graphical as your log in type. You can
always change it later.
27.
Click next and your done!
Part 2: Getting Linux Ready For Oracle.
1.
Log in to Linux as “oracle” with the password “oracle”.
2.
Click on the Icon at the bottom of the Desktop that
looks like a monitor with a foot on it. This is the terminal program.
3.
Enter this command in when the Terminal screen pops
up “su” (without the quotes).
4.
Then enter in the password you assigned for the root
user account (The administrator Account).Part 1. Step 18.
5.
Does the prompt
now look like ( [root@computername oracle]$ ) ? If so good.
6.
Type in
“pico .bash_profile”
7.
Move your cursor with the arrow buttons (not the mouse)
to the line that says
PATH=$PATH:$HOME/bin and change the entire line to this - PATH=$PATH:$HOME/bin:/usr/local/java/bin:/home/oracle/OraHome1/bin:/home/oracle/Compiere2/utils
8.
Now below the PATH line add the following variables –
COMPIERE_HOME=/home/oracle/Compiere2
ORACLE_HOME=/home/oracle/OraHome1
JAVA_HOME=/usr/local/java
ORACLE_SID=erp
ORACLE_OWNER=oracle
DBHOME=/home/oracle/OraHome1/bin/dbhome
ORAENV=/home/oracle/OraHome1/bin/oraenv
CORAENV=/home/oracle/OraHome1/bin/coraenv
ORACLE_BASE=/home/oracle
LD_LIBRARY_PATH=/home/oracle/OraHome1/lib
9.
Now add this to the Export Line –
export PATH COMPIERE_HOME ORACLE_HOME JAVA_HOME ORACLE_SID
ORACLE_OWNER DBHOME ORAENV CORAENV ORACLE_BASE
LD_LIBRARY_PATH
Your .bash_profile should look like this……..
# .bash_profile
# Get the aliases and
functions
if [ -f ~/.bashrc ]; then
. ~/.bashrc
fi
# User specific environment
and startup programs
PATH=$PATH:$HOME/bin:/usr/local/java/bin:/home/oracle/OraHome1/bin:/home/oracle/Compiere2/utils
COMPIERE_HOME=/home/oracle/Compiere2
ORACLE_HOME=/home/oracle/OraHome1
JAVA_HOME=/usr/local/java
ORACLE_SID=erp
ORACLE_HOME=/home/oracle/OraHome1
ORACLE_OWNER=oracle
DBHOME=/home/oracle/OraHome1/bin/dbhome
ORAENV=/home/oracle/OraHome1/bin/oraenv
CORAENV=/home/oracle/OraHome1/bin/coraenv
LD_LIBRARY_PATH=/home/oracle/OraHome1/lib
export
BASH_ENV=$HOME/.bashrc
fi
export
PATH COMPIERE_HOME ORACLE_HOME ORACLE_SID JAVA_HOME ORACLE_OWNER DBHOME ORAENV
CORAENV ORACLE_BASE CATALINA_HOME LD_LIBRARY_PATH
unset USERNAME
10.
Now hold down the “CTRL” key and while holding it press
the letter “o”. If you look at the bottom of the screen it should say …
File Name to Write: .bash_profile
11.
Press Enter to save it. Then press “CTRL” and the
letter “x” to exit.
12.
Now type in pico /etc/rc.d/rc.local
13.
Enter these values in at the bottom
…………………………………………………….
echo
3000000000 > /proc/sys/kernel/shmmax
echo 4096 >
/proc/sys/kernel/shmmni
echo 300 90000 100
150 > /proc/sys/kernel/sem
source /home/oracle/.bash_profile
cd /home/oracle/Compiere2/utils
/home/oracle/Compiere/utils/myEnvironment.sh
source /home/oracle/.bash_profile
cd /home/oracle/Compiere2/utils
/home/oracle/Compiere2/utils/RUN_Server2.sh A &
14.
Compare your file to one shown below then Press
“CTRL” “o” to save and press enter, then “CTRL” “x” to quit.
Your rc.local file should look
like this …….
#!/bin/sh
#
# This script will be
executed *after* all the other init scripts.
# You can put your own
initialization stuff in here if you don't
# want to do the full Sys V
style init stuff.
touch /var/lock/subsys/local
echo 3000000000 >
/proc/sys/kernel/shmmax
echo 4096 > /proc/sys/kernel/shmmni
echo 300 90000 100 150 >
/proc/sys/kernel/sem
cd
/home/oracle/Compiere2/utils
/home/oracle/Compiere/utils/my*.sh
source
/home/oracle/.bash_profile
cd
/home/oracle/Compiere2/utils
/home/oracle/Compiere2/utils/RUN_Server2.sh
A &
NOTE: The line….. echo 3000000000 > /proc/sys/kernel/shmmax
may need to be changed if you have trouble installing oracle later.
This number is fairly large, so
you may want to remove a zero or two if you encounter errors.
After the Oracle install is
complete come back to this line and change it to ………….
echo `expr 1024 \* 1024 \*
1024 ` > /proc/sys/kernel/shmmax
15.
Now we need to change to the /etc/rc.d/init.d
directory, so type……………..
“cd /etc/rc.d/init.d”
Then type …….
“pico lsnrora”
It’s going to be much easier to
just copy most of these examples and paste the text into pico.
In Linux you copy text by dragging
your cursor over all the text you want to copy with the left mouse button
pressed down.
With that text still highlighted,
move the mouse over to the shell with pico open in it, place the mouse inside
that window and then press BOTH mouse buttons at the same time. This will paste
the text into the file. After that, all you have to do is save it with CTRL O.
Then exit CTRL X.
Ok copy this ………….. and then paste it into pico….
#!/bin/sh
#
----------------------------------------------------------------------
# File: lsnrora
#
# Author: Martin Zahn / 11.08.99 (Tag der
Sonnenfinsternis)
#
# Purpose: Startup Oracle Listeners
# ----------------------------------------------------------------------
# Source function library.
. /etc/rc.d/init.d/functions
# Source networking
configuration.
. /etc/sysconfig/network
ORACLE_OWNER=oracle; export
ORACLE_OWNER
case "$1" in
'start') # Start Oracle
Listeners
echo -n "Starting Oracle Listeners: "
TNS_ADMIN=/oracle; export TNS_ADMIN
ORACLE_HOME=/home/oracle/OraHome1; export ORACLE_HOME
LD_LIBRARY_PATH=$ORACLE_HOME/lib; export LD_LIBRARY_PATH
su $ORACLE_OWNER -c "$ORACLE_HOME/bin/lsnrctl start
listener"
;;
'stop') # Stop Oracle
Listeners
echo -n "Stopping Oracle listeners: "
TNS_ADMIN=/oracle; export TNS_ADMIN
ORACLE_HOME=/home/oracle/OraHome1; export ORACLE_HOME
LD_LIBRARY_PATH=$ORACLE_HOME/lib; export LD_LIBRARY_PATH
su $ORACLE_OWNER -c "$ORACLE_HOME/bin/lsnrctl stop
listener"
;;
esac
Oh yeah.. and thanks to Mr. Zahn.
16.
We need to make one more script in the
/etc/rc.d/init.d directory.
Type………….
“pico compiere”
Then paste this text in……………
#!/bin/sh
#
----------------------------------------------------------------------
# Compiere Start Up
#
#
#
----------------------------------------------------------------------
# Source function library.
. /etc/rc.d/init.d/functions
# Source networking
configuration.
. /etc/sysconfig/network
ORACLE_OWNER=oracle; export
ORACLE_OWNER
case "$1" in
'start') # Start up
Compiere Database on Oracle9i
echo -n "Starting Compiere DB: "
TNS_ADMIN=/oracle; export TNS_ADMIN
ORACLE_HOME=/home/oracle/OraHome1; export ORACLE_HOME
LD_LIBRARY_PATH=$ORACLE_HOME/lib; export LD_LIBRARY_PATH
source /home/oracle/.bash_profile
cd /home/oracle/Compiere2/utils
su $ORACLE_OWNER -c "/home/oracle/Compiere2/utils/RUN_DBStart.sh"
;;
'stop') # Stop Compiere
DB
echo -n "Stopping Compiere DB On Oracle9i: "
TNS_ADMIN=/oracle; export TNS_ADMIN
ORACLE_HOME=/home/oracle/OraHome1; export ORACLE_HOME
LD_LIBRARY_PATH=$ORACLE_HOME/lib; export LD_LIBRARY_PATH
cd /home/oracle/Compiere2/utils
su $ORACLE_OWNER -c
"/home/oracle/Compiere2/utils/RUN_DBStop.sh"
;;
esac
Save it and exit pico.
Type in the following command to
make the files executable……….
“chmod 755 ls* co*”
Now we need to set things up so
the database will start automatically when the computer starts.
This saves you from having to
start everything manually every time you reboot.
You should still be in the
/etc/rc.d/init.d directory.
Change to the /etc/rc.d directory
by typing this
“cd ..”
(This is saying - Change
Directories UP One Level)
Now type in
“cd rc2.d”
type in ….
“ls”
This will display the files in the
directory. Make sure no already existing files have the same prefix as the file names below.
In other words, if you see a file
called S96local, change the Numeric value
on the files below to a unique number.
For the S## files try to keep
the Numbers in the 90’s if you can and make sure the number for lsnrora is LOWER
than the number for compiere. With the K## files make sure the numbers are low.
The Number for compiere now needs to be LOWER than the number for lsnrora.
Anyway,… these settings should be fine and you shouldn’t have to worry about
that.
Enter in these commands………..
ln –s ../init.d/lsnrora
S96lsnrora
ln –s
../init.d/compiere S97compiere
ln –s
../init.d/compiere K06compiere
ln –s
../init.d/lsnrora K07lsnrora
Enter in …
Now type (or Copy And Paste)
this….
cp K06compiere K07lsnrora ../rc0.d
cp K06compiere K07lsnrora ../rc1.d
cp S96lsnrora
S97compiere K06compiere K07lsnrora
../rc3.d
cp S96lsnrora
S97compiere K06compiere K07lsnrora ../rc4.d
cp S96lsnrora
S97compiere K06compiere K07lsnrora ../rc5.d
cp K06compiere K07lsnrora ../rc6.d
17.
Lets run a few quick tests to make sure everything is
OK.
Type in…….
source /etc/rc.d/rc.local
after running that command
type in …….
cat
/proc/sys/kernel/sem
If after executing the cat command, you see the output ……. 300
90000 100 150
You’re doing good.
18.
Finally, we need
to check a few settings and make a few
more changes.
On the Linux Gnome Desktop go to
the Main Menu ( The Foot With a little up arrow on it).
Select Programs…. Then…. System…. Then…. Network Configuration. It will
ask you for the root password
(Part 1. Step 18.) Enter in
“oracle”
The Network Config Utility will
appear and you should see your ethernet adapter listed under Description.
Select the Devices tab.
Make sure your card is highlighted
and then select Edit.
Click on the Protocols Tab, then
Edit.
You should see the IP address you
entered in during your Linux Installation (i.e. 192.168.1.42) Part1. Step 13.
If so… good, if not, enter in the
info again. Press ok. Then, Ok again on the next screen.
Now you should be back to the Main
Config window . Click on the Hosts tab.
Ok, now, I had some trouble with
oracle pulling my loopback address instead of my configured ethernet address.
I got around this by deleting it
and then re-installing it after the oracle install.
So, click on the entry 127.0.0.1
and select delete.
Click Add. Enter in Your --
IP Address
(192.168.1.42)
Your Hostname i.e.
(mypc.mydomain)
make sure the names are the same
as you chose during the install process)Part 1. Step 13.
For Aliases, enter in the first
part of your Hostname (i.e. the mypc
part of the name mypc.mydomain)
Now click on the DNS tab. Hostname
there should be “mypc”
Domain should be “mydomain”. Enter
those values in if they are not there.
Enter in your ISP,s DNS info and
don’t worry about the rest.
Click on Apply, then Close. It
should ask you to save the settings, click yes.
Now Re Boot your computer, ignore
any error messages and log in this time as the oracle user.
Username: oracle
Password: oracle
Now your ready
for the next step.
Part 3: Downloading and Installing Oracle9i
1.
You will have to join Oracle’s web site to get the
files, so do that first.
2.
Go to the download page for: Oracle9i Database Release 2 Enterprise/Standard Edition for Intel Linux
3.
Download all 3 files to /home/oracle
4.
When the download is complete, open up the
terminal and type ……………………………………
gunzip –dv lnx*
5.
After a few minutes your cursor will re-appear
and then type ……………………………………
cpio –idmv< lnx_920_disk1.cpio
When that is done type
…………………………………….
cpio –idmv< lnx_920_disk2.cpio
and Finally …………………………………….
cpio –idmv< lnx_920_disk3.cpio
You should now have 3 folders in
/home/oracle named Disk1 Disk2 Disk3 .
Type in this command to verify
ls (ls Lists or Views the contents of a directory
Type
……….. cd Disk1 (Remember Linux is case sensitive) (cd
means Change Directory)
Type
./run* (This will
start the Oracle Universal Installer)
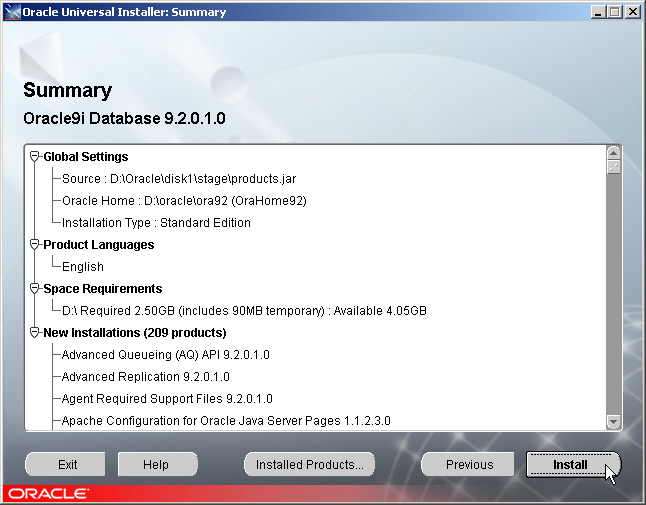
Now you
will see …
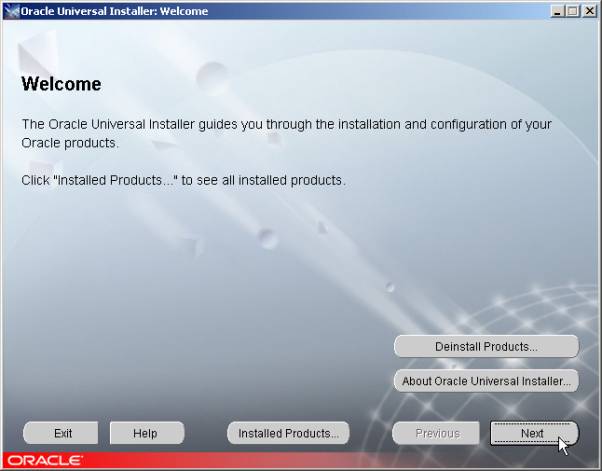
Click Next.
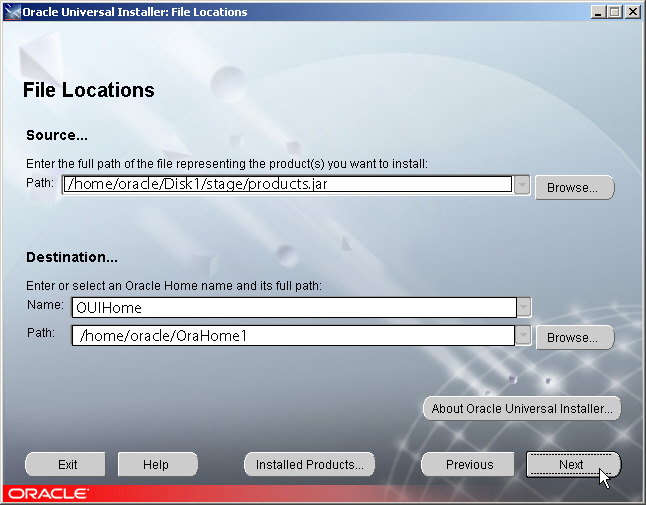
6. If the values for Name and Path are different from
this example, change them to match this example EXACTLY.
And remember case does matter!
7. Somewhere in here a message will pop up and ask you to
run a script as root……..
Do this to run it………………
Open up a terminal. Type in “su” then Your root password
(If you followed my example I used “oracle”)
Then issue this command………..
cd /tmp
then……………
./o*.sh
Then minimize the Terminal window, because you will have
to run 1 more script as root very soon.
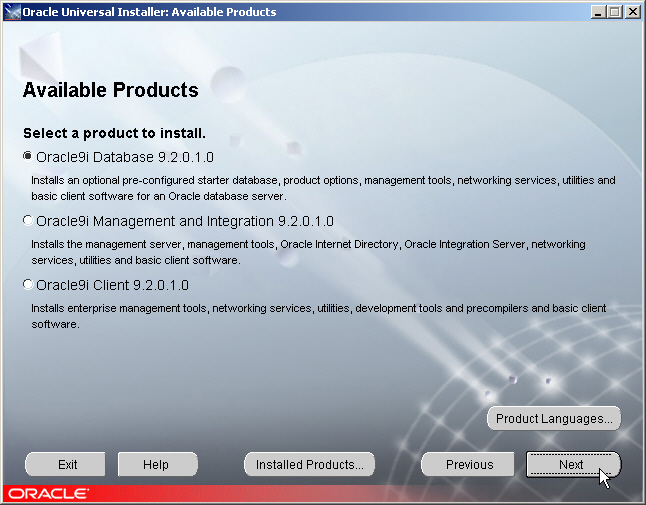
8. Select Oracle9i Database then click Next.
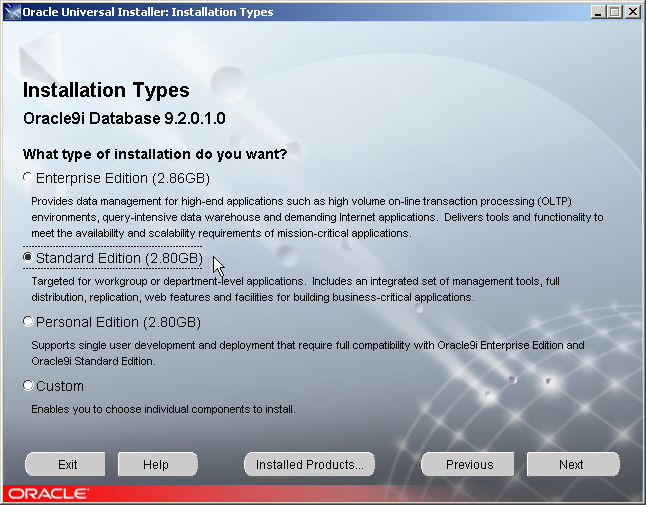
9. Select Standard Edition and then click Next.
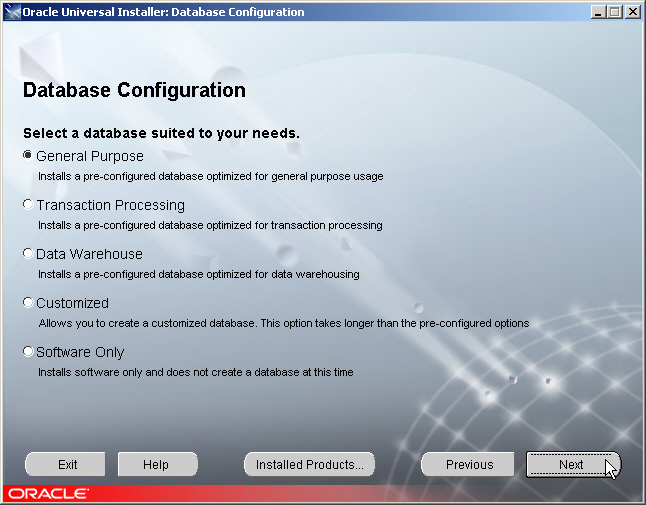
10. Select General Purpose then click Next.
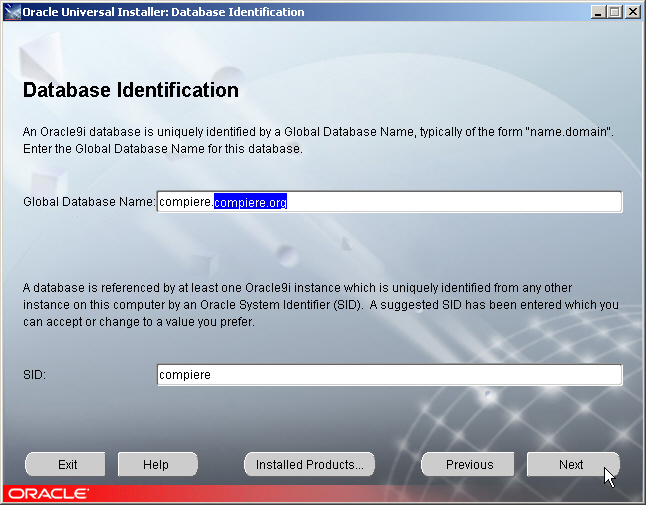
11. Replace compiere.compiere.org with…
erp.yourdomain
Again, yourdomain is to be replaced with the name you used
during the Network Setup ( Part 1. Step 13)
If you chose mypc.mydomain….
Then your Global Database name would be….
erp.mydomain
A value of erp.mypc.mydomain would be WRONG.
You only need to enter in the domain name.
The SID name should simply be..
erp
12. At this point it may ask you to run the Root.sh script…
open back up the terminal window you used before and enter this ….
cd
/home/oracle/OraHome1
(ENTER)
./root.sh (ENTER)
It will ask you the name of your local bin directory… enter
in……………
/usr/bin (ENTER)
Minimize the terminal again and return to the Oracle install
…..
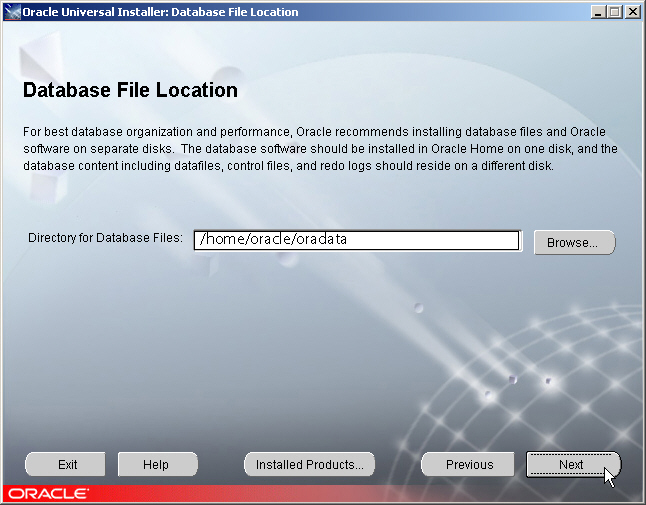
13. Make sure the Directory is /home/oracle/oradata
Click Next…
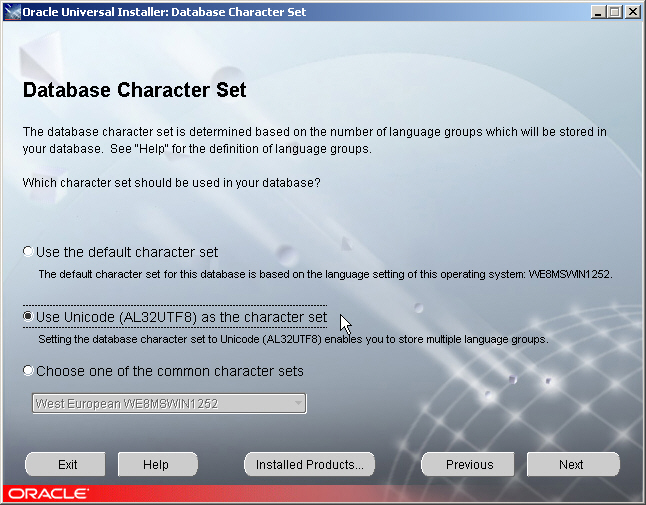
Select Unicode.. Next…
Click on Install.
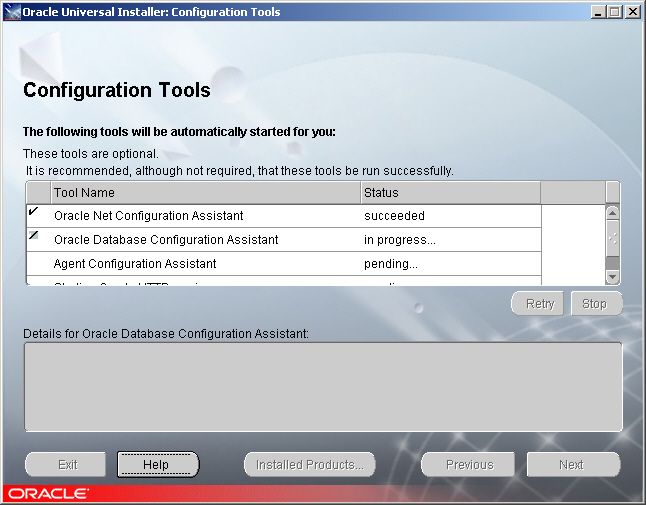
You will see this for a while, and eventually you will see
………………..
(Note: If Oracle Crashes at this point you may need to go to
Part 2. Step 14. and edit the SHMMAX number)
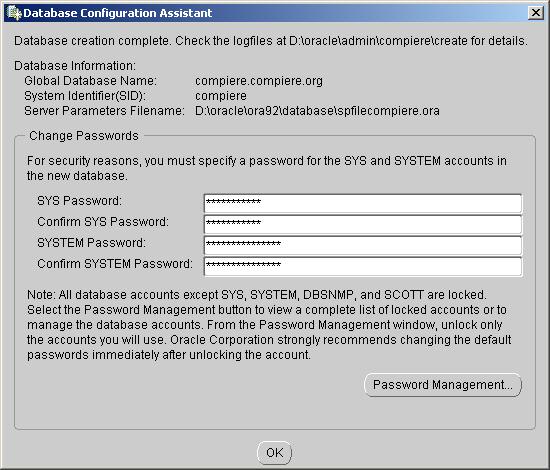
14. Enter in Values for your SYS and SYSTEM passwords.
I used …..
oracle
oracle
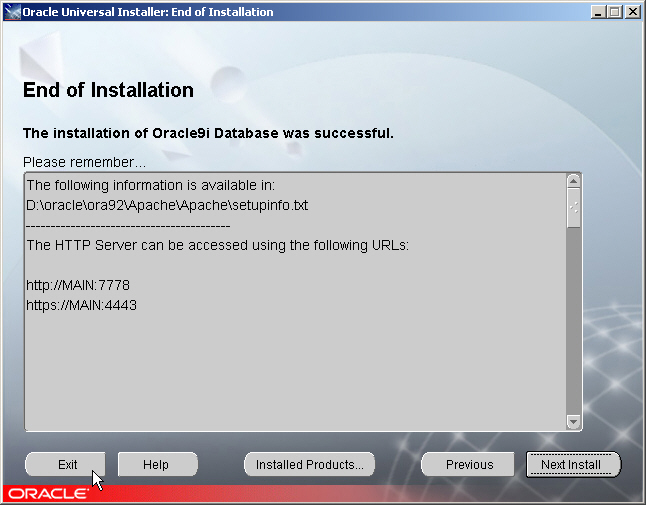
If all went well you will see this. Select EXIT.
It will ask if you are sure you want to quit, select yes.
Now the Oracle Enterprise Manager Console will start up.
Take a look around if you want (Be careful though!).
One last step you should perform just to be safe is…………..
Open up the minimized terminal window. You should still be
signed in as root. If you closed it by accident just follow step 7,s directions
again. Now type in……..
cd /home
chown –R oracle oracle
When the ‘chown’
command is finished …..
Reboot your computer. Log back in as oracle. Open up a
Terminal and type in…………………
ps –A | less
If you see anywhere on the screen the name
tnslsnr
Then Oracle probably installed successfully.
You are now ready to move on to installing Java.
Part 4: Installing Java 1.4.1
- Go to Suns web site and download the ..Linux
Self Extracting File.. (SDK not the JRE)
http://java.sun.com/j2se/1.4.1/download.html
- Save it to /home/oracle
- When the download is complete open up a terminal
and type this…….
su
It
will ask you for a password …. Supply the password you used for your root
(Administrative) account.
If
you followed what I used during setup … then the password is “oracle”.
Type
in…
ls
You
should see j2sdk-1_4_1_01-linux-i586.bin.
In your /home/oracle directory.
Now type in
mv j2sdk-1_4_1_01-linux-i586.bin /usr/local
to move the
file. Then type …..
cd /usr/local
- You are now in the /usr/local directory. Type in
the “ls” command to make sure the file you just moved is there.
Now enter these commands to make it executable……………..
chmod
777 j2sdk-1_4_0_01-linux-i586.bin (press enter)
now
lets run it…..
./j2sdk-1_4_1_01-linux-i586.bin (press enter)
Press
enter through the License Stuff and enter Yes at the end.
After
the installation is finished you will have a folder named…………
j2sdk1.4.1_01
- Now type this…………..
ln –s
/usr/local/j2sdk1.4.1_01 java
6. Finally, close the terminal and open
up a new one …..
This
will change you back into the oracle user.
Now
Type in……….
source /home/oracle/.bash_profile
then
type….
java -version
If
you see 1.4.1 as your version, then it has been installed correctly.
Part 5: Installing Compiere2
1. Download Compiere for
Linux into your /home/oracle directory from the Compiere Web Site.
As
of this writing, the version is Compiere 2.4.3b.. You will need to find the
file…….. compiereLinux_243b.tar.gzip or
one with a
similar name.
2. After the download is
complete… Open a Terminal and enter……….
gunzip –dv Compiere*
3. Now type ………….
tar –xvf Compiere*
4. A folder named
Compiere2 is now present in home/oracle.
5. cd into the Compiere
directory. You need to make all the RUN_* scripts executable.
You do this by entering in………
chmod 777 RUN*
6. At this point it would
be a good idea to make sure the Oracle Database is Up and Running.
Type in…….
ps -A
If you don’t see Oracle in the list of
running programs you will need to do this……
sqlplus /nolog (Press Enter)
connect / as SYSDBA (Press Enter)
startup (Enter)
You will see some messages ending with..
Database Opened.
Type in…..
quit
This will exit sqlplus and leave the
Database Running.
7. Now we can run
the Compiere Server Setup……..
./RUN_setup.sh
8. Ok, here are the
Values that you should use if you followed my install instructions…………………
Java Home | usr/local/j2sdk1_4_1_01
Compiere Home | /home/oracle/Compiere2
Apps Server | 192.168.1.42 Or
HOST_NAME.DOMAIN_NAME (See Part
1 Step 13 if Confused)
WEB PORT | 80
Database Server | 192.168.1.42 Or
HOST_NAME.DOMAIN_NAME
Database Name(SID) | erp (Or what ever you chose in Part 3 Step 11)
Database Port |1521
Database User | compiere
Mail Server |
mail.yourcompany.com ( You should use a
valid SMTP server here)
Admin E-Mail | YOUR E-Mail
address.
JNP PORT | 1099
(if it wont work try 1098)
TNS NAME |
erp.yourdomain (Part 3 Step 11)
System Password | oracle (Or what ever
you used in Part 3 Step 14)
Database Password | oracle (Same as above)
You can leave the Mail
User and Password fields as is.
Press the TEST button.
It may generate Errors,
this is fine as long as it finishes with “TEST OK”
Press Save, and after a
few moments the License agreement will Appear and the setup will be complete.
9. Now cd into the utils
directory and run ………….
RUN_ImportCompiere.sh
This will take some time
to run as it creates all the necessary tables, sample data and etc.
If it runs really fast
and generates errors… make sure that
Server2 is not running!
10. When this is
finished………..
./RUN_Server2.sh&
11. Close the Terminal
and open up a new one. Cd into Compiere2 and run………………
RUN_Compiere2.sh
12.The Compiere
Connection Window will appear. For your Application Host enter in……….
192.168.1.42
Enter in the same address for Database
Host.
Enter in your Database Name…………..
erp (if you used my example)
13. Press Test
Application, and it should give you
green Check Marks on Both Buttons.
15. Log in as :System
Password: System
Enjoy